
Many people might have a sigh and wondering why their photos always look like captured down with low quality. Don't ever worry if you're using even only a cellphone camera to take photos, this might help you. Here am I going to share a tutorial about photoshop on how you going to make your photo looks clearer and nice-r
So I'd pick one of my photo randomly to show you guys.
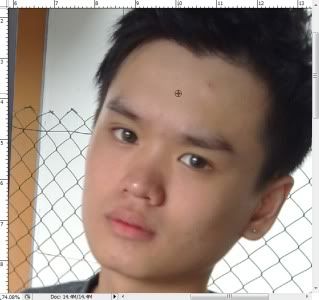
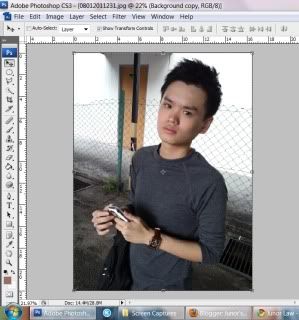
This is the original photo, taken by Nokia N97 Carl Zesis Cellphone Camera.

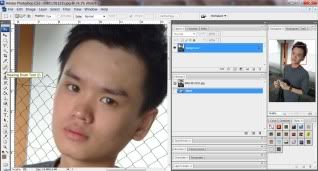
Okay, here we begin the tutorial. First of all, open your image with photoshop ( I'm just using photoshop CS3 )
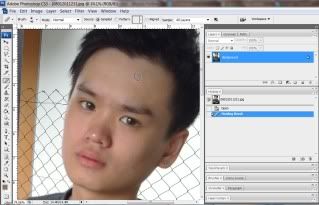
Second, edit your acne by using Healing Brush Tool
and you can grab any of the smooth skin and tone of color that match your skin to be 'REPLACED' to cover up your acne
Click on Alt and click on the smooth skin
and click on the acne that you going to cover it
and same with other acne
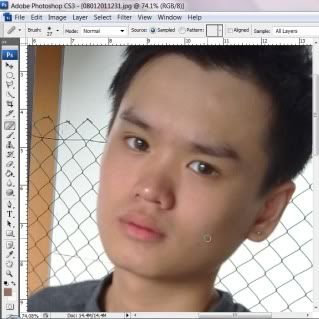
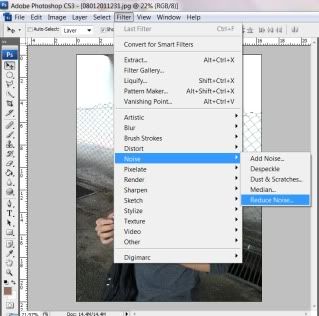
After done with your pimples, it's time to reduce noise of the photo.
Select Filter > Noise > Reduce Noise and click 'ok'
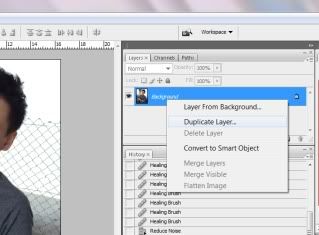
Third, we are going to make the photo looks clearer. It's easy which only involves of few steps.
-Duplicate your layer as show below and click 'ok'
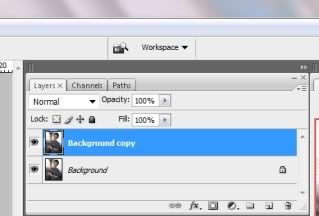
and you will see this, it duplicates into 2 layers
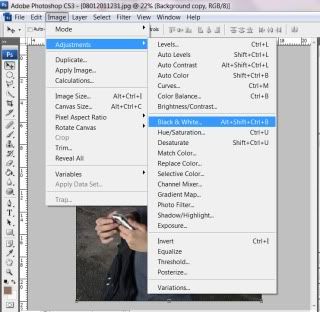
-After that, select Image > Adjustment > Black & White and click 'ok'
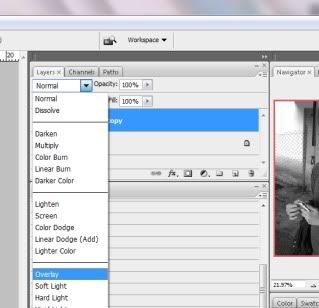
-Change the 'normal' to 'overlay'
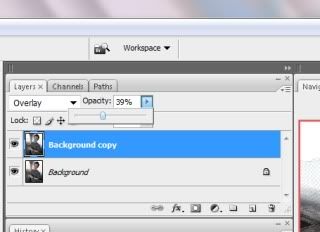
-After that change the 'opacity' that won't cause your photo looks fake
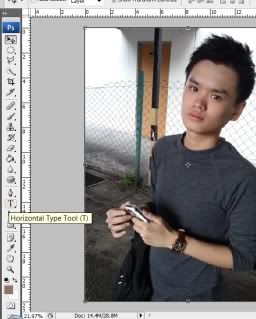
DONE!! and your photo should look like this
ps: and you can add on some words to your photo by using Type Tool
So, here is my production of it :D

So I'd pick one of my photo randomly to show you guys.
This is the original photo, taken by Nokia N97 Carl Zesis Cellphone Camera.

Okay, here we begin the tutorial. First of all, open your image with photoshop ( I'm just using photoshop CS3 )
Second, edit your acne by using Healing Brush Tool

and you can grab any of the smooth skin and tone of color that match your skin to be 'REPLACED' to cover up your acne
Click on Alt and click on the smooth skin

and click on the acne that you going to cover it

and same with other acne

After done with your pimples, it's time to reduce noise of the photo.
Select Filter > Noise > Reduce Noise and click 'ok'

Third, we are going to make the photo looks clearer. It's easy which only involves of few steps.
-Duplicate your layer as show below and click 'ok'

and you will see this, it duplicates into 2 layers

-After that, select Image > Adjustment > Black & White and click 'ok'

-Change the 'normal' to 'overlay'

-After that change the 'opacity' that won't cause your photo looks fake

DONE!! and your photo should look like this

ps: and you can add on some words to your photo by using Type Tool

So, here is my production of it :D

It is so so easy right!? Show me yours!
great!
ReplyDeletefast n easy..
ya^^ very easy^^ hahahhaha
ReplyDeleteSaperstein also recalls attending the American Bar Association Convention in Florida, shortly after Thomas was nominated to the High Court,
ReplyDeletesaid crisis management firm after offering his name.
In addition to the designer, there's usually a creative director or a stylist behind the
scenes to make business deals -- especially his own -- happen.
My weblog - crisis management attorney
Howdy, i read your blog from time to time and i own a similar one and i was just
ReplyDeletecurious if you get a lot of spam feedback? If so how do you stop
it, any plugin or anything you can suggest? I get so much lately it's driving
me mad so any support is very much appreciated.
Also visit my web-site ... business coaching; textboxx.Ru,